Reese’s Peanut Butter Earthquake Cake (Easy Chocolate Dessert Recipe)
Table of Contents
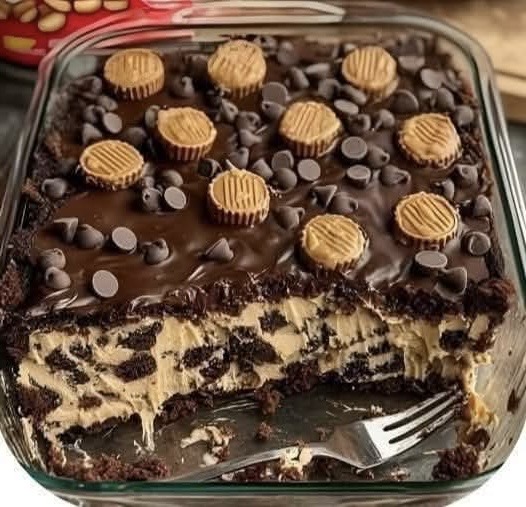
Reeses peanut butter earthquake cake is a rich, gooey dessert that combines chocolate cake, creamy peanut butter, and Reese’s cups in every bite.
Reese’s Peanut Butter Earthquake Cake is a rich, gooey dessert that combines chocolate cake, creamy peanut butter, and chunks of Reese’s peanut butter cups in every bite. This easy earthquake cake recipe is perfect for parties, holidays, or anytime you want a crowd-pleasing chocolate and peanut butter dessert without complicated steps.
What makes this Reese’s Peanut Butter Earthquake Cake so special is its soft, slightly cracked texture and the irresistible swirl of peanut butter and chocolate throughout the cake. Made with simple pantry ingredients, this recipe comes together quickly and delivers bakery-style results at home. If you love easy peanut butter desserts, this cake will become one of your favorites.
Ingredients
- 1 box chocolate cake mix
- 3 large eggs
- ½ cup vegetable oil
- 1 cup water or milk
- 8 oz cream cheese, softened
- ½ cup unsalted butter, softened
- 2 cups powdered sugar
- 1 teaspoon vanilla extract
- 1½ cups Reese’s peanut butter cups, chopped
- ½ cup chocolate chips (optional)
How to Make Reeses Peanut Butter Earthquake Cake
- Preheat your oven to 350°F (175°C) and grease a 9×13-inch baking dish.
- In a large bowl, prepare the chocolate cake batter using the cake mix, eggs, oil, and water (or milk). Mix until smooth.
- Gently fold half of the chopped Reese’s peanut butter cups into the cake batter.
- Pour the batter evenly into the prepared baking dish.
- In another bowl, beat the cream cheese, butter, powdered sugar, and vanilla extract until smooth and creamy.
- Drop spoonfuls of the peanut butter mixture over the cake batter. Use a knife to lightly swirl it through the batter without over-mixing.
- Sprinkle the remaining Reese’s peanut butter cups and chocolate chips on top.
- Bake for 35–40 minutes, until the edges are set but the center is still slightly gooey.
- Let the cake cool for at least 15 minutes before slicing and serving.
Tips for the Best Earthquake Cake
- Use room-temperature cream cheese and butter for a smoother peanut butter swirl.
- Do not over-swirl the topping; this keeps the “earthquake” look and texture.
- For extra richness, drizzle melted peanut butter over the cake before serving.
- Serve warm with vanilla ice cream for the ultimate dessert experience.
This reeses peanut butter earthquake cake recipe is perfect for parties, holidays, and easy homemade desserts.
Storage and Freezing
Store Reese’s Peanut Butter Earthquake Cake in an airtight container at room temperature for up to 2 days, or in the refrigerator for up to 5 days. To freeze, wrap individual slices tightly in plastic wrap and store them in a freezer-safe container for up to 2 months. Thaw overnight in the refrigerator before serving.
Try our Pot Roast with Potatoes and Carrots for more ideas
Frequently Asked Questions
Can I freeze Reese’s Peanut Butter Earthquake Cake?
Yes, this cake freezes very well. Wrap slices individually and thaw before serving.
Can I make this cake without Reese’s cups?
Absolutely. You can substitute peanut butter chips or leave them out for a simpler peanut butter chocolate cake.
Can I use homemade cake batter instead of a box mix?
Yes, a homemade chocolate cake batter works perfectly and adds even more flavor.
Try our Slow Cooker Beef & Noodles for more ideas
Final Thoughts
This Reese’s Peanut Butter Earthquake Cake recipe is the perfect balance of chocolate and peanut butter flavors in an easy, homemade dessert. Whether you’re baking for a special occasion or just craving something sweet, this cake is guaranteed to impress.
👉 If you enjoyed this recipe, explore more easy peanut butter dessert recipes on Leonvi and share your results in the comments ⭐⭐⭐⭐⭐
If you love chocolate desserts, this reeses peanut butter earthquake cake is a must-try recipe.